Shop amazon
 Shop LINE Stickers
 Shop Redbubble
 Shop TPT
 Shop Creative fabrica
 Shop etsy

บทความ
GridView เป็นอีกหนึ่งคอมโพเนนต์ของ Yii2 ที่ช่วยให้เราสร้างตารางแสดงผลข้อมูลได้อย่างง่ายดาย
GridView เป็นอีกหนึ่งคอมโพเนนต์ของ Yii2 ที่ช่วยให้เราสร้างตารางแสดงผลข้อมูลได้อย่างง่ายดาย โดย GridView จะสร้าง HTML table ให้เราโดยอัตโนมัติโดยอิงจาก Model หรือ ArrayDataProvider ที่เรากำหนด
ตัวอย่างการใช้งาน GridView ใน Yii2 ดังนี้:
-
สร้าง Model ของข้อมูลที่เราต้องการแสดงผล
-
สร้าง Action ใน Controller สำหรับแสดง GridView และส่งข้อมูลไปแสดงผล
public function actionIndex()
{
    $searchModel = new MyModelSearch();
    $dataProvider = $searchModel->search(Yii::$app->request->queryParams);

    return $this->render('index', [
        'searchModel' => $searchModel,
        'dataProvider' => $dataProvider,
    ]);
}
โดยในตัวอย่างนี้
MyModelSearchเป็น Model ที่ใช้สำหรับค้นหาข้อมูล และ$dataProviderเป็น ArrayDataProvider ที่เก็บข้อมูลที่จะนำไปแสดงผล -
สร้าง View สำหรับแสดง GridView โดยใช้ GridView Widget ของ Yii2
GridView::widget([ 'dataProvider' => $dataProvider, 'filterModel' => $searchModel, 'columns' => [ ['class' => 'yii\grid\SerialColumn'], 'id', 'name', 'email:email', 'created_at:datetime', ['class' => 'yii\grid\ActionColumn'], ], ]);ในตัวอย่างนี้
dataProviderเป็น ArrayDataProvider ที่เราส่งมาจาก Controller และfilterModelเป็น Model ที่ใช้สำหรับค้นหาข้อมูล และcolumnsกำหนด columns ของตารางที่ต้องการแสดงผล -
กำหนดการใช้งาน GridView ตามความต้องการ โดยสามารถกำหนด option ต่าง ๆ เช่น การใช้งาน Pagination, Sorting, การแสดง Column และอื่น ๆ ตามความต้องการ
-
ใน Yii2 GridView มีความสามารถในการจัดการ Pagination และ Sorting ของข้อมูลได้อย่างง่ายดายด้วยการใช้งานตัวเลือก (option) ต่าง ๆ ที่มีอยู่ให้เลือก
การใช้งาน Pagination ใน GridView สามารถทำได้โดยกำหนด
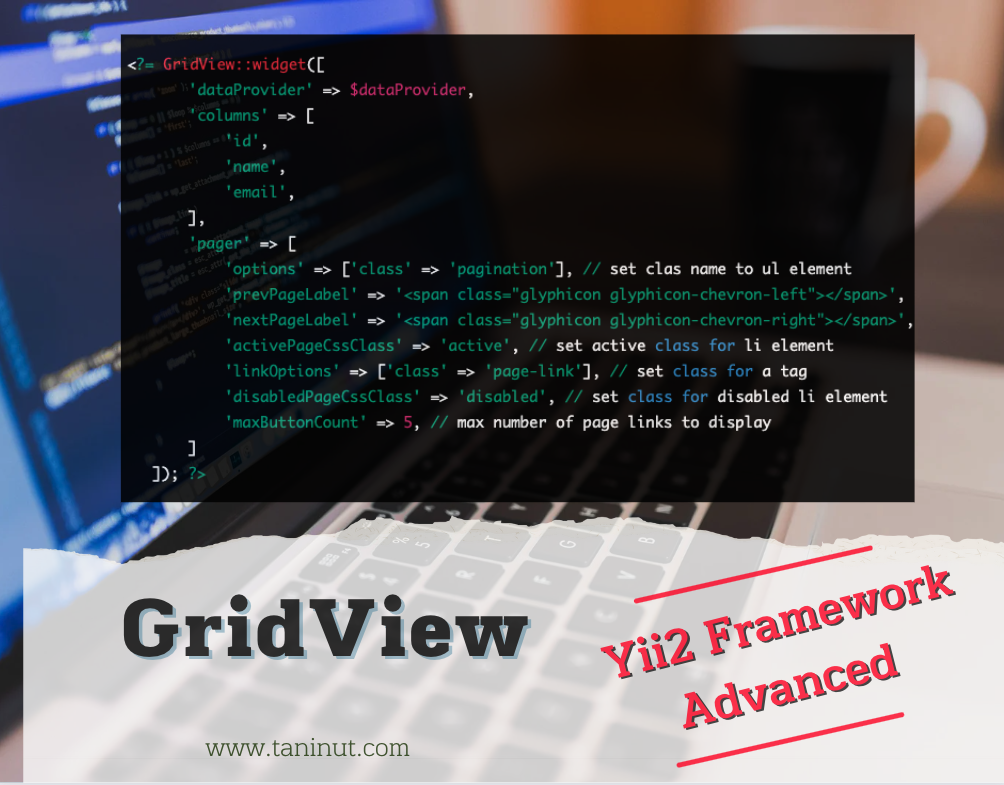
dataProviderด้วยyii\data\ActiveDataProviderหรือyii\data\ArrayDataProviderและกำหนดpaginationoption ตามตัวอย่างนี้:<?= GridView::widget([ 'dataProvider' => $dataProvider, 'columns' => [ 'id', 'name', 'email', ], 'pager' => [ 'options' => ['class' => 'pagination'], // set clas name to ul element 'prevPageLabel' => '<span class="glyphicon glyphicon-chevron-left"></span>', 'nextPageLabel' => '<span class="glyphicon glyphicon-chevron-right"></span>', 'activePageCssClass' => 'active', // set active class for li element 'linkOptions' => ['class' => 'page-link'], // set class for a tag 'disabledPageCssClass' => 'disabled', // set class for disabled li element 'maxButtonCount' => 5, // max number of page links to display ] ]); ?> -
ใน Yii2 GridView มีความสามารถในการจัดการ Pagination และ Sorting ของข้อมูลได้อย่างง่ายดายด้วยการใช้งานตัวเลือก (option) ต่าง ๆ ที่มีอยู่ให้เลือก
การใช้งาน Pagination ใน GridView สามารถทำได้โดยกำหนด
dataProviderด้วยyii\data\ActiveDataProviderหรือyii\data\ArrayDataProviderและกำหนดpaginationoption ตามตัวอย่างนี้:<?= GridView::widget([ 'dataProvider' => $dataProvider, 'columns' => [ 'id', 'name', 'email', ], 'pager' => [ 'options' => ['class' => 'pagination'], // set clas name to ul element 'prevPageLabel' => '<span class="glyphicon glyphicon-chevron-left"></span>', 'nextPageLabel' => '<span class="glyphicon glyphicon-chevron-right"></span>', 'activePageCssClass' => 'active', // set active class for li element 'linkOptions' => ['class' => 'page-link'], // set class for a tag 'disabledPageCssClass' => 'disabled', // set class for disabled li element 'maxButtonCount' => 5, // max number of page links to display ] ]); ?> -
สำหรับ Sorting ใน GridView สามารถทำได้โดยกำหนด
dataProviderด้วยyii\data\ActiveDataProviderหรือyii\data\ArrayDataProviderและกำหนดsortoption ตามตัวอย่างนี้:<?= GridView::widget([ 'dataProvider' => $dataProvider, 'columns' => [ [ 'attribute' => 'id', 'label' => 'ID', 'headerOptions' => ['class' => 'text-center'], 'contentOptions' => ['class' => 'text-center'], 'sortLinkOptions' => ['class' => 'sorting'], ], [ 'attribute' => 'name', 'label' => 'Name', 'headerOptions' => ['class' => 'text-center'], 'contentOptions' => ['class' => 'text-center'], 'sortLinkOptions' => ['class' => 'sorting'], ], [ 'attribute' => 'email', 'label' => 'Email', 'headerOptions' => ['class' => 'text-center'], 'contentOptions' => ['class' => 'text-center'], 'sortLinkOptions' => ['class' => 'sorting'], ], ], 'pager' => [ 'options' => ['class' => 'pagination'], // set clas name to ul element 'prevPageLabel' => '<span class="glyphicon glyphicon-chevron-left"></span>', 'nextPageLabel' => '<span class="glyphicon glyphicon-chevron-right"></span>', 'activePageCssClass' => 'active', // set active class for li element 'linkOptions' => ['class' => 'page-link'], // set class for a tag 'disabledPageCssClass' => 'disabled', // set class for disabled li element 'maxButtonCount' => 5, // max number of page links to display ], 'sort' => [ 'defaultOrder' => [ 'id' => SORT_DESC, ], 'attributes' => [ 'id' => [ 'label' => 'ID', 'default' => SORT_DESC, ], 'name' => [ 'label' => 'Name', 'default' => SORT_ASC, ], 'email' => [ 'label' => 'Email', 'default' => SORT_ASC, ], ], 'sortLinkOptions' => ['class' => 'sorting'], // set class for th element ], ]); ?>ในตัวอย่างนี้
sortกำหนดให้เรียงลำดับตามidโดยเรียงจากมากไปน้อย (SORT_DESC) และกำหนดให้สามารถเรียงลำดับตามnameและemailได้โดยเรียงตามตัวอักษรเริ่มต้นจาก A ถึง Z (SORT_ASC) -
นอกจากนี้ยังสามารถกำหนด option อื่น ๆ เช่น การใช้งาน Filter, Export, การแสดงข้อมูลที่ไม่ต้องการแสดงได้โดยใช้
GridViewWidget ของ Yii2 ในการกำหนด option เหล่านี้การใช้งาน Filter สามารถทำได้โดยกำหนด
filterModelของ GridView ดังนี้:GridView::widget([ 'dataProvider' => $dataProvider, 'filterModel' => $searchModel, 'columns' => [ 'id', 'name', 'email', ], ]);ในตัวอย่างนี้
filterModelเป็น Model ที่ใช้สำหรับค้นหาข้อมูล -
การใช้งาน Export สามารถทำได้โดยกำหนด
exportoption ของ GridView ดังนี้:GridView::widget([ 'dataProvider' => $dataProvider, 'columns' => [ 'id', 'name', 'email', ], 'export' => [ 'fontAwesome' => true, 'showConfirmAlert' => false, 'target' => GridView::TARGET_BLANK, 'icon' => [ 'excel' => 'fa fa-file-excel-o', 'pdf' => 'fa fa-file-pdf-o', 'csv' => 'fa fa-file-text-o', 'html' => 'fa fa-file-code-o', ], 'options' => ['class' => 'btn btn-default'], 'label' => 'Export', ], ]);ในตัวอย่างนี้
exportกำหนดให้สามารถ Export เป็น Excel, PDF, CSV และ HTML ได้ และกำหนด option อื่น ๆ เช่น fontAwesome, showConfirmAlert, target, icon, options และ label -
การแสดงข้อมูลที่ไม่ต้องการแสดง สามารถทำได้โดยกำหนด
visibleoption ใน Column ของ GridView ดังนี้:<?= GridView::widget([ 'dataProvider' => $dataProvider, 'columns' => [ 'id', 'name', [ 'attribute' => 'email', 'visible' => false, // hide this column ], ], ]); ?>ในตัวอย่างนี้
emailถูกกำหนดให้ไม่แสดงผลในตารางแสดงข้อมูล -
การใช้งาน GridView ใน Yii2 เป็นวิธีการแสดงผลข้อมูลที่มีประสิทธิภาพสูง และมีความสามารถในการ customize ตามความต้องการ โดยสามารถกำหนด option ต่าง ๆ ได้ตามต้องการ
อย่างไรก็ตาม ในกรณีที่ต้องการ customize GridView ในรูปแบบที่ไม่สามารถกำหนดได้จาก option ที่มีอยู่ สามารถสร้าง GridView Widget ใหม่ขึ้นมาจาก
yii\grid\GridViewและ override method ต่าง ๆ ที่ต้องการ ตัวอย่างเช่นการแสดงข้อมูลเป็นรูปภาพแทนข้อความuse yii\grid\GridView; class ImageGridView extends GridView { public $imageAttribute; // attribute name for image url protected function renderDataCellContent($model, $key, $index) { if ($this->imageAttribute !== null) { $url = $model->{$this->imageAttribute}; return Html::img($url, ['width' => '100']); } else { return parent::renderDataCellContent($model, $key, $index); } } }ในตัวอย่างนี้
ImageGridViewสืบทอดมาจากyii\grid\GridViewและ override methodrenderDataCellContentเพื่อแสดงข้อมูลเป็นรูปภาพแทนข้อความ โดยกำหนด$imageAttributeเพื่อกำหนด attribute ที่เก็บ url ของรูปภาพ -
สำหรับการใช้งาน
ImageGridViewสามารถทำได้ดังนี้:<?= ImageGridView::widget([ 'dataProvider' => $dataProvider, 'columns' => [ 'id', 'name', [ 'attribute' => 'image_url', 'imageAttribute' => 'image_url', // set attribute for image url ], ], ]); ?>ในตัวอย่างนี้
ImageGridViewกำหนดimageAttributeเพื่อแสดงข้อมูลเป็นรูปภาพแทนข้อความ โดยกำหนดimage_urlเป็น attribute ที่เก็บ url ของรูปภาพ -
เนื่องจาก GridView ใน Yii2 เป็น Component ของ Yii Framework ทำให้สามารถกำหนด Theme ของ GridView ได้โดยสร้าง GridView สำหรับแต่ละ Theme แล้วกำหนด option ต่าง ๆ ของ GridView ตาม Theme นั้นๆ
ตัวอย่างเช่น สำหรับ Theme Bootstrap 4 สามารถสร้าง GridView ใหม่ขึ้นมาจาก
yii\grid\GridViewและกำหนด option ตามตัวอย่างนี้:use yii\grid\GridView; class Bootstrap4GridView extends GridView { public $tableOptions = ['class' => 'table table-striped table-bordered']; public $headerRowOptions = ['class' => 'thead-light']; public $pager = [ 'class' => 'yii\bootstrap4\LinkPager', 'options' => ['class' => 'pagination justify-content-center'], 'prevPageCssClass' => 'page-item', 'nextPageCssClass' => 'page-item', 'prevPageLabel' => '<span class="page-link">«</span>', 'nextPageLabel' => '<span class="page-link">»</span>', 'activePageCssClass' => 'page-item active', 'disabledPageCssClass' => 'page-item disabled', 'linkOptions' => ['class' => 'page-link'], ]; }ในตัวอย่างนี้
Bootstrap4GridViewสืบทอดมาจากyii\grid\GridViewและ override option ต่าง ๆ ที่ใช้กับ Bootstrap 4 Theme เช่นกัน โดยกำหนด$tableOptionsเพื่อกำหนด class ของ table,$headerRowOptionsเพื่อกำหนด class ของ header row และ$pagerเพื่อกำหนดการแสดงผลของ Pagination


หนังสือพัฒนาตัวเอง
จุดเริ่มต้นที่ชัดเจน

 เพิ่มลงตะกร้า